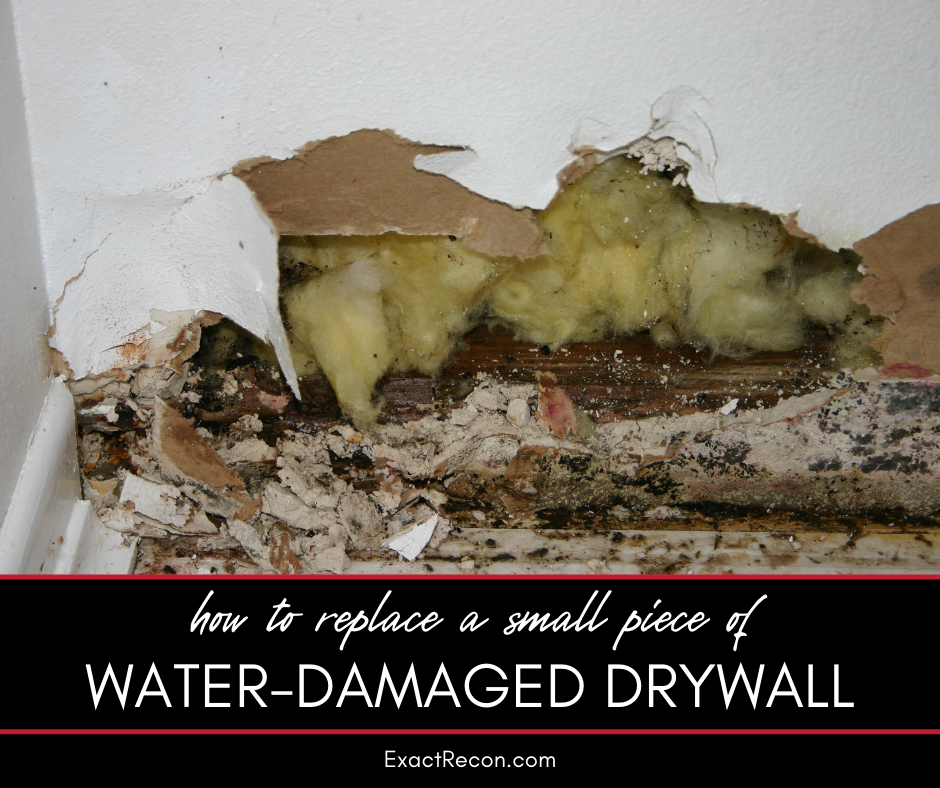
Water damage can wreak havoc on your home’s interiors, and drywall is often one of the first casualties. When drywall gets wet, it can become weak, moldy, and unsightly. Replacing it is essential not only for aesthetics but also for the health and safety of your home’s occupants. If you’re facing this issue or want to be prepared for potential future incidents, this guide is for you. With our expertise, we’ll walk you through the process of replacing water-damaged drywall effectively.
How to Replace Water-Damaged Drywall
Replacing water-damaged drywall might seem challenging, but with the right approach, it’s manageable. Here’s a step-by-step breakdown.
This guide covers:
- Identifying the extent of damage
- Safety precautions
- Removing damaged drywall
- Preparing the area for new drywall
- Installing new drywall
- Finishing touches
- Preventing future water damage
Here’s a closer look at each.
Identifying the Extent of Damage
The first step in addressing water-damaged drywall is to determine the severity of the damage. While some signs are immediately visible, such as discoloration or mold growth, others might require a closer inspection. Gently pressing against the drywall can help determine its integrity. If it feels soft or crumbles easily, it’s a clear indication that the integrity of the drywall has been compromised. It’s also essential to check for any signs of mold, as this can pose health risks. Mold can appear as dark spots or streaks and might have a musty odor. If any of these signs are present, the affected drywall sections will need replacement.
Safety Precautions
Before embarking on the repair process, it’s crucial to ensure your safety. Working in a well-ventilated area helps disperse dust and mold spores, reducing inhalation risks. Wearing safety goggles will protect your eyes from debris, while gloves will shield your hands from sharp objects and potential irritants. A mask, especially one designed to filter mold spores, is essential to prevent inhalation of harmful particles.
Removing Damaged Drywall
Once you’ve identified the damaged sections, use a utility knife to cut around the affected area. It’s advisable to cut in a rectangular or square shape to make the replacement process more straightforward. As you remove the damaged section, inspect the insulation or any materials behind the drywall. If these materials show signs of water damage or mold growth, they will also need to be replaced to ensure the issue doesn’t recur.
Preparing the Area for New Drywall
After removing the damaged section, it’s essential to prepare the area for the new drywall. This involves cleaning the exposed studs and ensuring that no residual moisture or mold is present. If the insulation was damaged, replace it with new insulation, ensuring it fits snugly between the studs. This step is crucial to prevent future issues and ensure the new drywall adheres properly.
Installing New Drywall
With the area prepared, measure the gap where the old drywall was removed. Cut a new piece of drywall to these dimensions. Position the new drywall piece in the gap and secure it using drywall screws, ensuring it’s firmly attached to the studs. Ensure the edges of the new drywall align seamlessly with the existing wall.
Finishing Touches
Once the new drywall is in place, it’s time to make it blend with the rest of the wall. Apply a joint compound over the seams where the new and old drywall meet. Place drywall tape over the wet joint compound, pressing it smoothly to avoid any bubbles or wrinkles. Allow the compound to dry as per the manufacturer’s instructions. Once dry, sand the area to create a smooth surface. Finally, paint the repaired section to match the rest of the wall, ensuring a seamless appearance.
Preventing Future Water Damage
After the repair, it’s essential to address the root cause of the water damage to prevent future occurrences. This might involve repairing any leaks in the plumbing or roof, ensuring proper ventilation in areas like bathrooms or kitchens, or even regrading the landscape outside to direct water away from the home’s foundation. Regular inspections and maintenance can go a long way in preventing water damage in the future.
FAQ About Replacing Water-Damaged Drywall
Here are some frequently asked questions about replacing water-damaged drywall. If you don’t see the answers you’re looking for here, please call our office. We’re here to help.
Can I Patch Small Areas of Water Damage?
Yes, minor damage can often be patched. However, if there’s any sign of mold, it’s best to replace the entire section.
How Do I Know If the Insulation Is Damaged?
If insulation feels wet, has a musty odor, or shows signs of mold, it should be replaced.
Can I Paint Over Water-Damaged Drywall?
It’s not advisable. Painting over water damage can lead to mold growth and won’t address the underlying issue.
How Long Should I Wait Before Painting New Drywall?
Ensure the joint compound is completely dry, which typically takes 24 hours, before painting.
What If I’m Unsure About the Repair?
Always consult with professionals if you’re unsure about the extent of damage or the repair process.
Replacing water-damaged drywall is essential for maintaining a safe and beautiful home. While the process requires attention to detail, with the right tools and guidance, it’s a task you can tackle with confidence. And remember, for any questions or assistance, professionals like us are always here to help.
Do You Need a Disaster Remediation Expert in Washtenaw County or Jackson County?
If your home has already been damaged, we can help. Check out our services and call Exact Recon for your free disaster remediation quote today. We offer:


